If you’re thinking about migrating your site to a new hosting provider, you may be wondering what it will mean for your domain registration. Perhaps you’re worried visitors will be unable to access your content if you switch web hosts.
This is why it’s important to understand what nameservers and the Domain Name System (DNS) are and how they work. This understanding can help you manage your migration more efficiently.
In this post, we’ll take a closer look at nameservers and DNS records. We’ll also show you how you can access these essential components of your site. Let’s get started!
Nameservers vs. DNS Records: What They Are and How They Work
A nameserver connects your domain name with the Internet Protocol (IP) address of the server that hosts your website. Thanks to nameservers, browsers like Google Chrome and Mozilla Firefox can direct users to the right page when they type in a site address.

For example, if you type “myblog.com” into Google, the nameserver tells the browser where that domain is located (i.e., the address of your web host). Without this information, the browser wouldn’t be able to display the site.
Nameservers form part of an online database known as the Domain Name System (DNS). This system is part of the Transmission Control Protocol (TCP) and the Internet Protocol (IP), which defines how computers communicate via the internet and private networks.
DNS plays an important role, as it aids the conversion of simple domain names (e.g., myblog.com) into an IP address (e.g., 12.34.56.78), which computers then use to identify one another on the network. Effectively, DNS functions like a phone directory. It contains records of web devices, such as computers and servers, and their associated IP addresses.
Every domain has its own DNS records, which include the nameserver. These are generated when you register your domain name with a hosting provider or a domain registrar. Therefore, your nameserver points your domain name to the IP address of your host or registrar.
Your Great Idea Starts with a Great Domain
Don’t let someone else register your URL. Search DreamHost’s 400+ TLDs to find the perfect fit for your website.

How the Browser Finds Your Website
Everything that is connected to the internet has an IP address, including websites and servers. There are millions of IPs in use all over the world, and they are all unique. Your site will have its own IP address, which your host provides.
However, your domain name needs to be able to connect with your site’s IP address. For example, when you enter a site’s URL into an address bar, your browser will try to access the corresponding page. To do this, it will go through some steps that the user doesn’t see.
First, the browser connects to the target site’s domain registrar. Then the registrar points the browser to the target site’s hosting provider (e.g., dreamhost.com). Once the browser arrives at the web host, it will look for the correct nameserver (e.g., ns1.dreamhost.com).
The process is practically instantaneous, so as users, we don’t fully appreciate the additional steps. However, should you decide to change your hosting provider, you’ll need to point your domain name to your new host. This is a vital step. Otherwise, users will not be able to find or access your site.
Related: How Do Websites Work?
How to Use Nameservers and DNS Records
Knowing how to access your domain’s DNS records, including your nameservers, can help you arrange a smoother transition to your new host. Let’s take a look at the different ways you can locate and manage these important records.
Locating and Managing Your Nameservers
Your domain’s nameservers can be found in your web hosting account. These might also be available on the hosting company’s documentation page.
The nameservers for domains managed by DreamHost are:
- ns1.dreamhost.com
- ns2.dreamhost.com
- ns3.dreamhost.com
If you’re a DreamHost client, you can also log in to your hosting account to view your nameservers. To start, navigate to Websites > Manage Websites in the side menu.

Next, find the domain you wish to edit and click on the DNS tab on the right side of the screen. This will bring up a page with your nameservers.
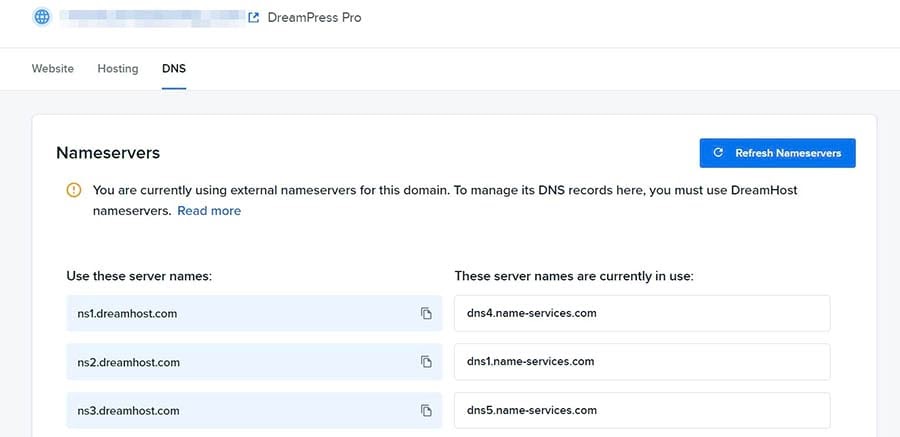
Note that if your domain is registered with a different company, you won’t be able to update your nameservers from your DreamHost account. To manage your nameservers, you’ll need to log in to your account with the company that manages your domain.
If your domain is registered with DreamHost, you’ll be able to edit your nameservers. For instance, if you wish to replace your current nameservers, you can simply erase them from the box and type in your new ones.
You can also manage your domain from the Registrations page in your account. For more information about this, you can read our complete instructions for editing your nameservers on DreamHost.
Alternatively, you can find out what a website’s nameservers are by performing a WHOIS lookup. Nameservers are public records, so it is possible to find this information by using a third-party tool.
Several sites offer this service, including lookup.icann.org.
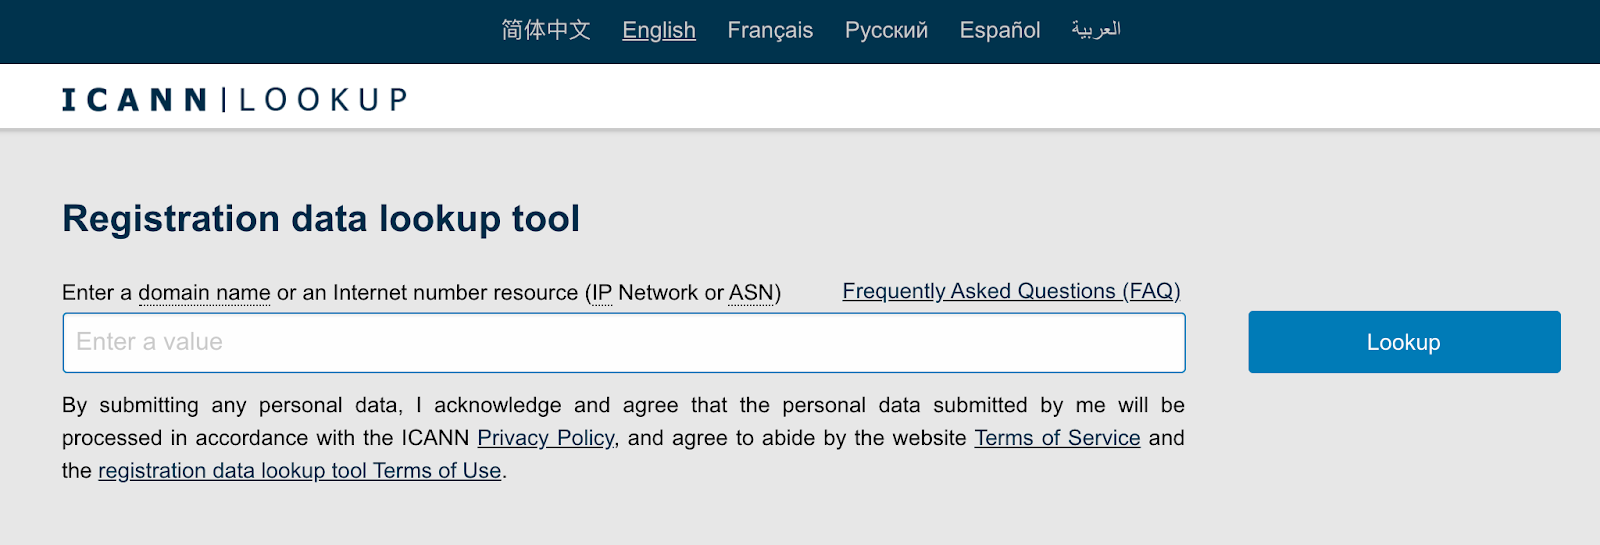
You can type the domain into the search bar, and a list of records will appear. For example, here are the nameservers for google.com:
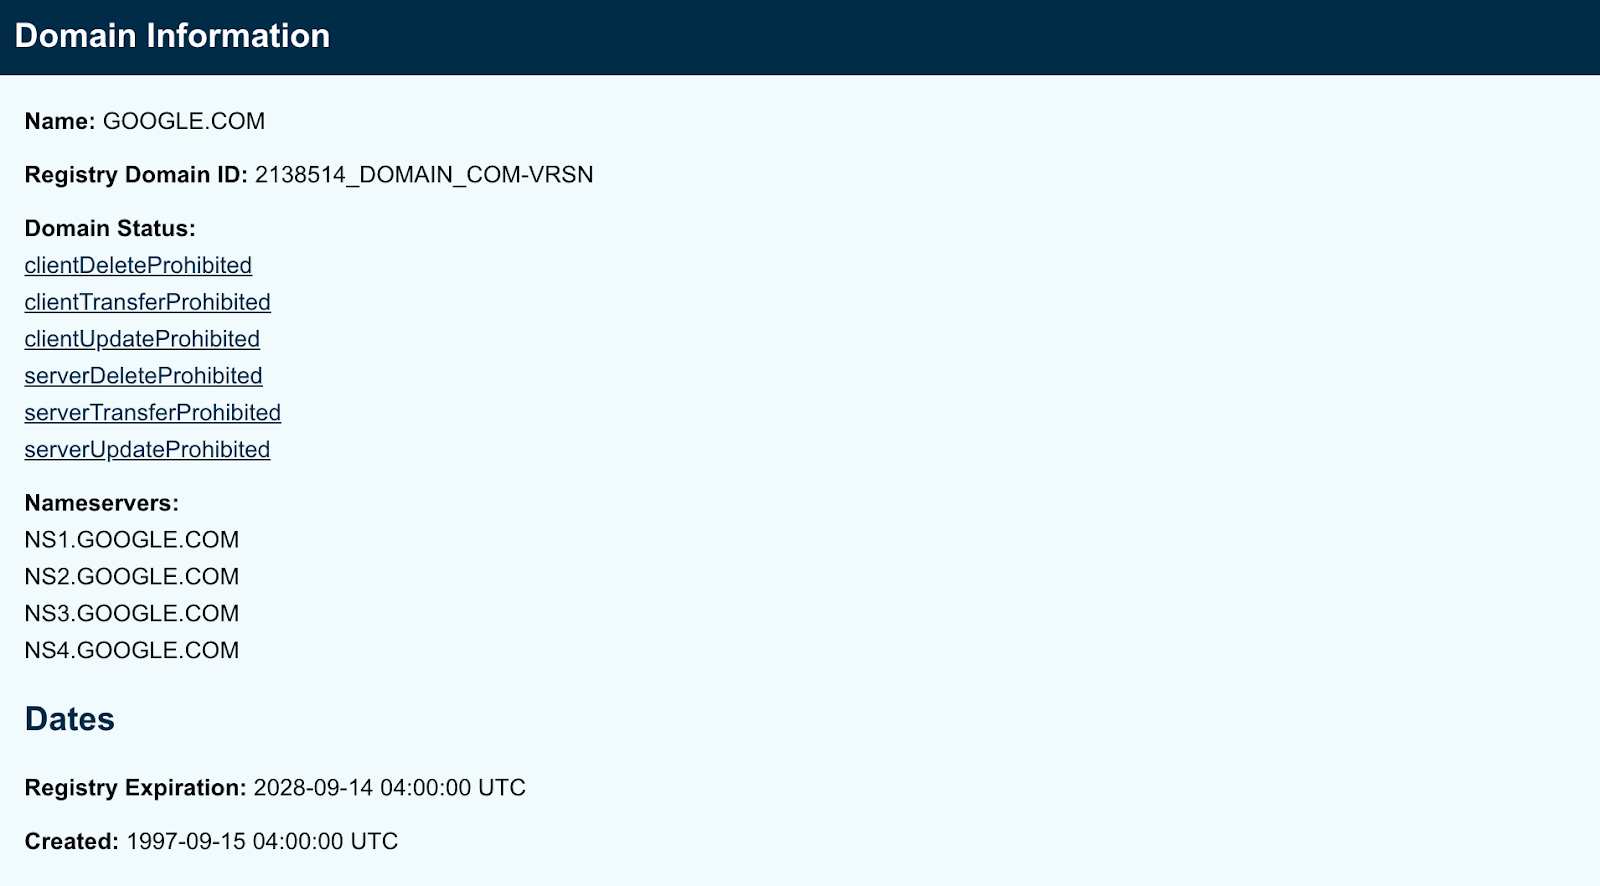
Note that a WHOIS search can also show the personal details of the domain’s owner, including their name and email address. Some hosting providers and domain registrars offer WHOIS privacy, which protects the identity of the user.
Related: What Is Domain Privacy Protection?
Locating and Managing Your DNS Records
Your DNS records are just as easy to locate and manage. You can log in to your hosting account to view your records and make changes to them. If your domain is managed by a third party, such as a domain name registrar, you’ll need to log in to your account with that company.
If you have a DreamHost account, your DNS records can be found on the same page as your nameservers.

You can add a new DNS record to your domain by clicking on the blue Add Record button. As you may notice, there are different types of records you can create. Let’s take a closer look at the most common ones.
A Record
The address record is the most basic type of DNS record. It is used to point a domain (or subdomain) to an IP address.
CNAME Record
The canonical name record points a domain to another domain, as opposed to an IP address. This is used when a site has subdomains, such as shop.myblog.com or donations.myblog.com.
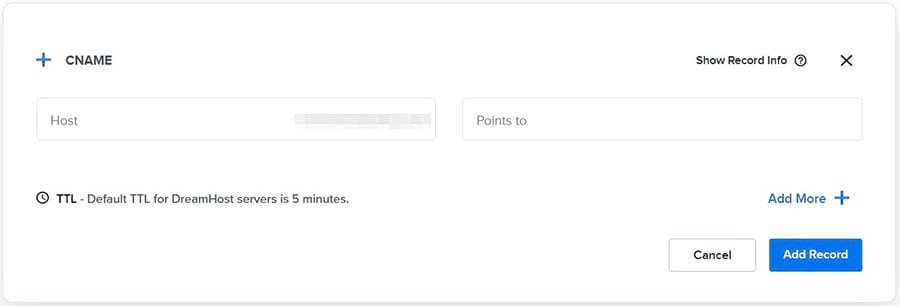
These are subdomains of myblog.com. Let’s say that each of these subdomains has a CNAME record containing the value “myblog.com.” Since the DNS is looking for an IP address, when the CNAME record is accessed, a further lookup is carried out at myblog.com (as this is the value contained in the CNAME file).
It will then return the IP address stored in myblog.com’s “A” record. This means that these subdomains are aliases of the main domain, and the canonical name (or “true name”) of these subdomains is actually “myblog.com.”
MX Record
A mail exchange record is used to direct emails to an address registered on your domain (e.g., hello@myblog.com) per the Simple Mail Transfer Protocol (SMTP), the standard protocol for email.
It is important to ensure that your MX records point to the right mail server. If not, emails won’t be delivered to your account. We also recommend that you back up your emails before switching to a different host.

NS Record
As mentioned previously, this is the nameserver record. You can use this setting to change your nameservers so that they point to your new hosting provider.
TXT (Text) Record
This one allows you to insert text into your DNS records. Originally, the TXT record was designed for human notes, such as site descriptions or development details. However, it is possible to include machine-readable data.

This record can help you to protect your site against spam. It also enables you to verify your domain, such as by adding a Google Site Verification record. It is very common to have multiple TXT records for a single website.
Related: Understanding the Different Kinds of Domains
Monitoring Your DNS Records
When updating your nameservers and other domain records, you’ll need to take DNS propagation into account. This is the time it takes for your DNS records to update across the internet. For example, when you modify your nameserver to point to your new hosting company, this change can take up to 72 hours to come into effect.
At DreamHost, we offer a DNS propagation checker to help you monitor your records. To access this tool, simply click on DNS checker on your Records page.

On the next page, you can check your website’s current IP address and DNS record information. Our interactive maps show you the status of your records across nameservers in different locations.
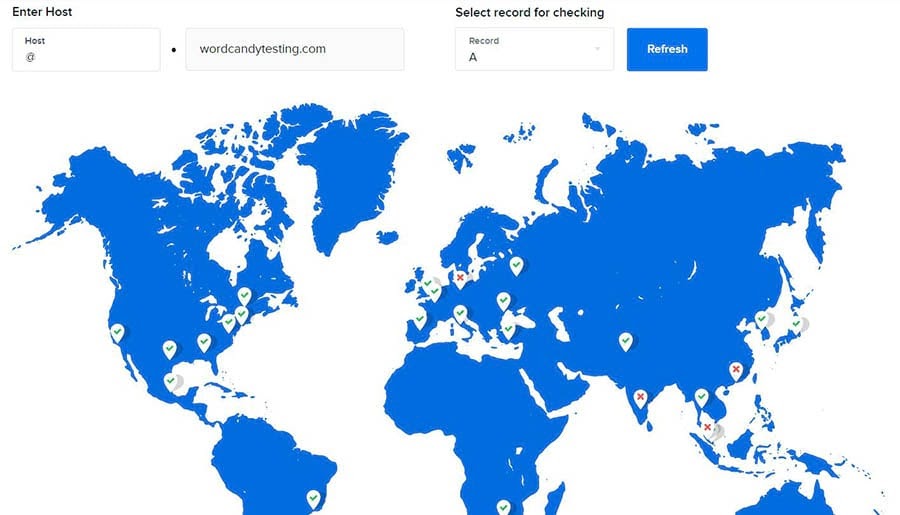
The green checkmarks on the map indicate that your DNS is up-to-date in the specified locations. Meanwhile, a single red cross suggests there might be a problem with the DNS server in that location.
If you see multiple red crosses, it may mean that you haven’t configured your DNS at the company where you registered your domain. However, this could also be a sign that your new DNS settings haven’t yet finished updating.
DNS Management Made Easy
Whether you need help identifying a domain's nameservers, understanding a DNS query, or choosing a web host, we can help! Subscribe to our monthly newsletter so you never miss an article.

Nameservers vs. DNS in a Nutshell
Understanding how nameservers and DNS Records work can ensure a smooth transition when migrating your site to a new host. It is imperative that your domain name points to the correct nameserver. Otherwise, site visitors will be unable to access your pages.
At DreamHost, we make your life easier by managing the entire transition process, including your domain transfers. We also enable you to manage your own domains and DNS from your hosting account, and our service comes with free privacy protection for your domain.
